No pictures today. It's been a frustrating week with not a lot of progress.
On Wednesday, Troy set to finishing the wiring for the vanity wall. He needed his drill that can make holes at 90° because he couldn't fit the "regular" drill between the studs. While he was using it, it made a bad noise and started smelling like burnt plastic. Never a good thing.
So he took it apart, discovered what was wrong, fixed it and put it back together. And then it did the same thing. So he tried again, and maybe even one more time. And then it still wasn't working. So he was done for the day and now he has a new drill.
It feels like a lot of wasted time, but at least now he can be very sure that getting a new one was necessary.
I, on the other hand, was still working on putting the shims on the hallway floor so the subfloor would be level. Last night I discovered that I used the wrong screw as a reference point not only on the strip that I had just installed, but also the previous strip where the glue was well-dried.
So I spent the evening with a hammer and crowbar removing the incorrect shims, grinding off or pulling out the brads, and cleaning up the surface so I could put shims down again. The glue gave pretty quickly on the old floor boards because they were painted, but there was another section where the shims were glued to some new lumber and that was some work. Troy ended up finishing up the cleaning with a chisel.
Now I should be all set to redo that work today. After thoughts last night of maybe finishing that section in one big push, I now have the same thought today. There's more to do, but I have more time too so we'll see.
It can be frustrating to go backwards but it hasn't happened very often to us so we're going to chalk this up to the cost of doing business.
Showing posts with label floor. Show all posts
Showing posts with label floor. Show all posts
Saturday, March 18, 2017

Wednesday, September 28, 2011
A Floor and a Flourish

The last section we had to do was about 2x5' and is going to be directly under one of the booths. So with some extra care, extra screws and extra adhesive, Troy went ahead and installed a couple of patches and got the floor done.
We have a single solid surface for a floor. Woo hoo.
Here it is looking to the north west:

And here looking south/southwest:

Now for the flourish. I wanted a pair of corbels to go under the counter on the side of the island where it hangs over 12 inches. I priced some when I ordered the cabinets and while one style was about $220, the other was $350. EACH! The way the sales person reacted when she saw that, I don't think she would have let me buy them even if I begged. But I didn't.
When I got home, I did a little ebay search and came up with a very nice option. Two days later I had won a nice pair of mismatched corbels (~$150 if you're curious) and they arrived yesterday:

I love how they match but aren't the same. I presume they were handmade as they aren't the same size and the carving isn't identical from one to the other.

Sunday, September 25, 2011
Servitude Sunday: Not Enough Flooring
No pictures of today; sorry, I'm too tired. And I'm a little disappointed with our progress. We did get some flooring down, but I was pretty determined to get it all done. I was even willing to work more than two hours. I was even willing to miss the kick off of the Colts game. Three pieces of plywood would do it.
We only had two.
And flooring really isn't something you want to piece together from scraps.
So we're not done, but the good news is that the only piece left is in the south east corner and we never walk there. (That's where the table will end up.) So for daily life we can walk on flooring all the way across the kitchen. It will be so nice.
If that's the good news, the great news is that we brought the flooring over the 4" gap in in the floor between the kitchen and the dining room. This one:
 So that is covered and hopefully soon to be forgotten.
I think that's all I've got. Have a good night, all!
We only had two.
And flooring really isn't something you want to piece together from scraps.
So we're not done, but the good news is that the only piece left is in the south east corner and we never walk there. (That's where the table will end up.) So for daily life we can walk on flooring all the way across the kitchen. It will be so nice.
If that's the good news, the great news is that we brought the flooring over the 4" gap in in the floor between the kitchen and the dining room. This one:

I think that's all I've got. Have a good night, all!
Sunday, September 18, 2011
Servitude Sunday: Floors and Cupboard Hangers
Another Sunday, another work session. Once thing we did was continue the flooring. Progress was halted by a big drain pipe being in the way. It was running along the left side of the chimney in the picture below:
 If you look carefully (or if you click on it for a larger version), you can see where it was by finding the hole in the floor where the electric is coming through. As a side note, Troy was about to disconnect that box today to get the floor in but realized that a wire continues to the second level. We thought we might lose something important (like lights in the bathroom, or ???) A second look determined that we could work around the box so it ended up not being a problem.
Back to the matter at hand, Troy took out the pipe that was in the way and replaced it with this one:
 that runs just on the other side of the wall. This will end up inside a closet/storage area and definitely not in the way. It is also part of the solution to the terrible plumbing situation discussed in a recent post. Troy doesn't quite have all the "uphill" drains out yet but he hopes to soon.
Currently we are without a drain to the downstairs sink. Troy assured me the shower was fine to use, but after my shower this morning he found half of the basement wet. [Can you relate to that, Yvonne??] Apparently the drainpipe just fell off again. He is hoping to still have both fixed tonight. (I said, "Please have it done...I want to shower in the morning." Troy replied, "Oh, I will. I want to shower tonight!") As he fixes the plumbing, the old parts seem to get jealous for attention and start to give us trouble!
Anyway, all this is to say that the pipe is out of the way and we could put down some more of the subfloor. I measured the funny shaped pieces, Troy cut them,
 we laid them in place and then screwed them down.
 Look at all that floor! We can now walk from the foyer to the back completely on a flat floor. The south end including the hallway to the dining room needs to be done yet.
Before I got to the floor, however, I was working on the filler wood we're going to use to hang the upper cabinets. You can see three of them here (the horizontal bits):
 They vary in height because this is where the cabinet heights change to get around the beam. I measured and cut them, and then Troy came in with the pneumatic nail gun.
That is one step done to prepare for the cabinets because they are coming....I ordered them on Saturday. I was so excited. Everything went well, double checked the layout and really liked the woman I worked with. She had some good ideas which saved us some money (turns out it's cheaper to add a toe-kick to a wall cabinet than to order a narrow depth base unit) and seemed to "get" what I was doing. She also encouraged the suped-up sink cabinet with shelves and door storage which I hadn't even considered. We got in on a free sink cabinet deal and they don't care if it's simple or delux, so we went delux! (In return I taught her about the option of ordering a "handicap" toe kick because we're considering having the island at a higher height.)
Cabinets should be at the store by about October 9. We won't be ready for them by then, but we have a place to store them and decided it was better to have them than to be caught waiting for them. The thought right now is that we may have them in by Christmas. That means we would also have walls (drywall I mean) and insulation. Also counters and a kitchen sink. Oh, to have a kitchen sink again!!

Back to the matter at hand, Troy took out the pipe that was in the way and replaced it with this one:

Currently we are without a drain to the downstairs sink. Troy assured me the shower was fine to use, but after my shower this morning he found half of the basement wet. [Can you relate to that, Yvonne??] Apparently the drainpipe just fell off again. He is hoping to still have both fixed tonight. (I said, "Please have it done...I want to shower in the morning." Troy replied, "Oh, I will. I want to shower tonight!") As he fixes the plumbing, the old parts seem to get jealous for attention and start to give us trouble!
Anyway, all this is to say that the pipe is out of the way and we could put down some more of the subfloor. I measured the funny shaped pieces, Troy cut them,


Before I got to the floor, however, I was working on the filler wood we're going to use to hang the upper cabinets. You can see three of them here (the horizontal bits):

That is one step done to prepare for the cabinets because they are coming....I ordered them on Saturday. I was so excited. Everything went well, double checked the layout and really liked the woman I worked with. She had some good ideas which saved us some money (turns out it's cheaper to add a toe-kick to a wall cabinet than to order a narrow depth base unit) and seemed to "get" what I was doing. She also encouraged the suped-up sink cabinet with shelves and door storage which I hadn't even considered. We got in on a free sink cabinet deal and they don't care if it's simple or delux, so we went delux! (In return I taught her about the option of ordering a "handicap" toe kick because we're considering having the island at a higher height.)
Cabinets should be at the store by about October 9. We won't be ready for them by then, but we have a place to store them and decided it was better to have them than to be caught waiting for them. The thought right now is that we may have them in by Christmas. That means we would also have walls (drywall I mean) and insulation. Also counters and a kitchen sink. Oh, to have a kitchen sink again!!
Tuesday, September 06, 2011
Servitude Monday (Holidays Count)
It wasn't a Sunday, but I thought since I wasn't putting in my 10 hours at my job on Monday, I could probably "give" two of them to Troy. It wasn't sexy, but I did get all the old paneling and other wood scraps cut up and into the garbage bins. And then I even had time to vacuum up the mess from the hand saw. The floor was looking pretty spiffy.

(Troy and I had this discussion a few weeks ago--do I need to clean up the floor before we put down the subfloor? My theory is that it is only going to get dirty anyway and um, it's not like you are ever going to see it. Troy didn't like the thought of it one bit. For the record, I only vacuumed in this case because I didn't want to live in the mess, not because I decided Troy was right.)
Troy got a few more exciting things done. Like cut the hole for the exhaust fan
 and then get it covered.

He also got the hot water line run and capped so he could test it. We now technically have hot and cold water in the kitchen.
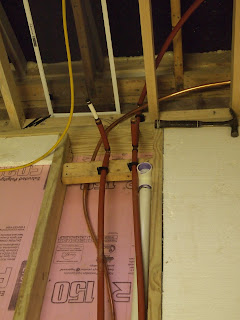
And then, to win a bet he had with me, he screwed down the first piece of the subfloor.

As I type, he is trying to cram in little styrofoam pellets to insulate that section in and around the pipes. I suggested he should pour the pellets in before he screwed down the plywood, but he couldn't wait. He thought it would work better to push them in from the side. (I remain unconvinced.)
But that is the start of a real floor, people! When's the next holiday celebrating labour?

(Troy and I had this discussion a few weeks ago--do I need to clean up the floor before we put down the subfloor? My theory is that it is only going to get dirty anyway and um, it's not like you are ever going to see it. Troy didn't like the thought of it one bit. For the record, I only vacuumed in this case because I didn't want to live in the mess, not because I decided Troy was right.)
Troy got a few more exciting things done. Like cut the hole for the exhaust fan


He also got the hot water line run and capped so he could test it. We now technically have hot and cold water in the kitchen.

And then, to win a bet he had with me, he screwed down the first piece of the subfloor.

As I type, he is trying to cram in little styrofoam pellets to insulate that section in and around the pipes. I suggested he should pour the pellets in before he screwed down the plywood, but he couldn't wait. He thought it would work better to push them in from the side. (I remain unconvinced.)
But that is the start of a real floor, people! When's the next holiday celebrating labour?
Friday, August 12, 2011
Is Remodeling Your House the Key to Not Developing Alzheimer's?
So now that we have cleared the kitchen floor, it's time to build on top of it again. When he's not melting lead, Isaac has been learning how to make sure your floor is level.
The first thing to do is to tie a piece of string tight across the floor at one side, making it the height you want the subfloor to sit on. In our case, this is the same height as the floor joists Troy put in on the newly poured concrete on the west side.
Here is the string on the south end of the kitchen:
 Barely above the floorboards.
Here it is on the north end:
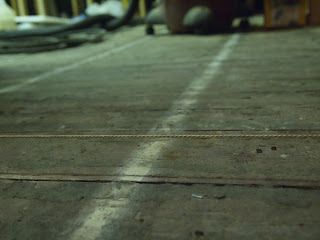 About 1.5" above the floor. This is right in front of the bathroom door. I only had to trip on it twice before it was mapped in my brain and I started automatically stepping over it. It's occurred to me that having your house in constantly new arrangements of disarray is very good for your brain. You're repeatedly being presented with new challenges and having to relearn things you thought you knew. I think this is even better than crossword puzzles (or dare I say, even knitting?!) for staving off Alzheimer's. Troy and I should do well in old age...
Anyway, back to the kitchen. After you have the master string in place, you put up new pieces of string perpendicular to the first over each floor joist in turn and fill in the gap with an appropriately sized shim.
Make sure you have a lot of shims in various heights.
 Isaac made many shims from 1/16" to 1-1/4" by 1/16" increments.
They are then glued into place on top of the floor joists (which are under the floor boards, of course).
 When the subfloor goes in, it will sit on the shims, still be supported by the floor joists, but be level.
 Isaac has been getting quite a number of them done during the days and Troy does one or two in the evening.
It will be so exciting to have the subfloor down and have one continuous floor surface. It almost boggles my mind that that may happen soon. Small steps and milestones...I relish them all!
The first thing to do is to tie a piece of string tight across the floor at one side, making it the height you want the subfloor to sit on. In our case, this is the same height as the floor joists Troy put in on the newly poured concrete on the west side.
Here is the string on the south end of the kitchen:

Here it is on the north end:

Anyway, back to the kitchen. After you have the master string in place, you put up new pieces of string perpendicular to the first over each floor joist in turn and fill in the gap with an appropriately sized shim.
Make sure you have a lot of shims in various heights.

They are then glued into place on top of the floor joists (which are under the floor boards, of course).


It will be so exciting to have the subfloor down and have one continuous floor surface. It almost boggles my mind that that may happen soon. Small steps and milestones...I relish them all!
Sunday, July 17, 2011
Someone's in the Kitchen...

Troy's been cutting up the waste wood products and those have been getting bagged and hauled out to the curb.

Things are starting to clear out and the room is looking spacious again. Sometimes I regret how much more "full" it's going to feel with counters, an island and table and chairs. Then I realize how crazy that is.
Thursday, July 07, 2011
Getting to the Bottom of It
Troy wrote about tearing out the floor already, but I'll share a few more details.
Looking into the southeast corner before we started:
 And after we were done:
 (We didn't quite get the last layer of linoleum up in that corner. The lovely brown colour was painted on top of the original floral pattern.)
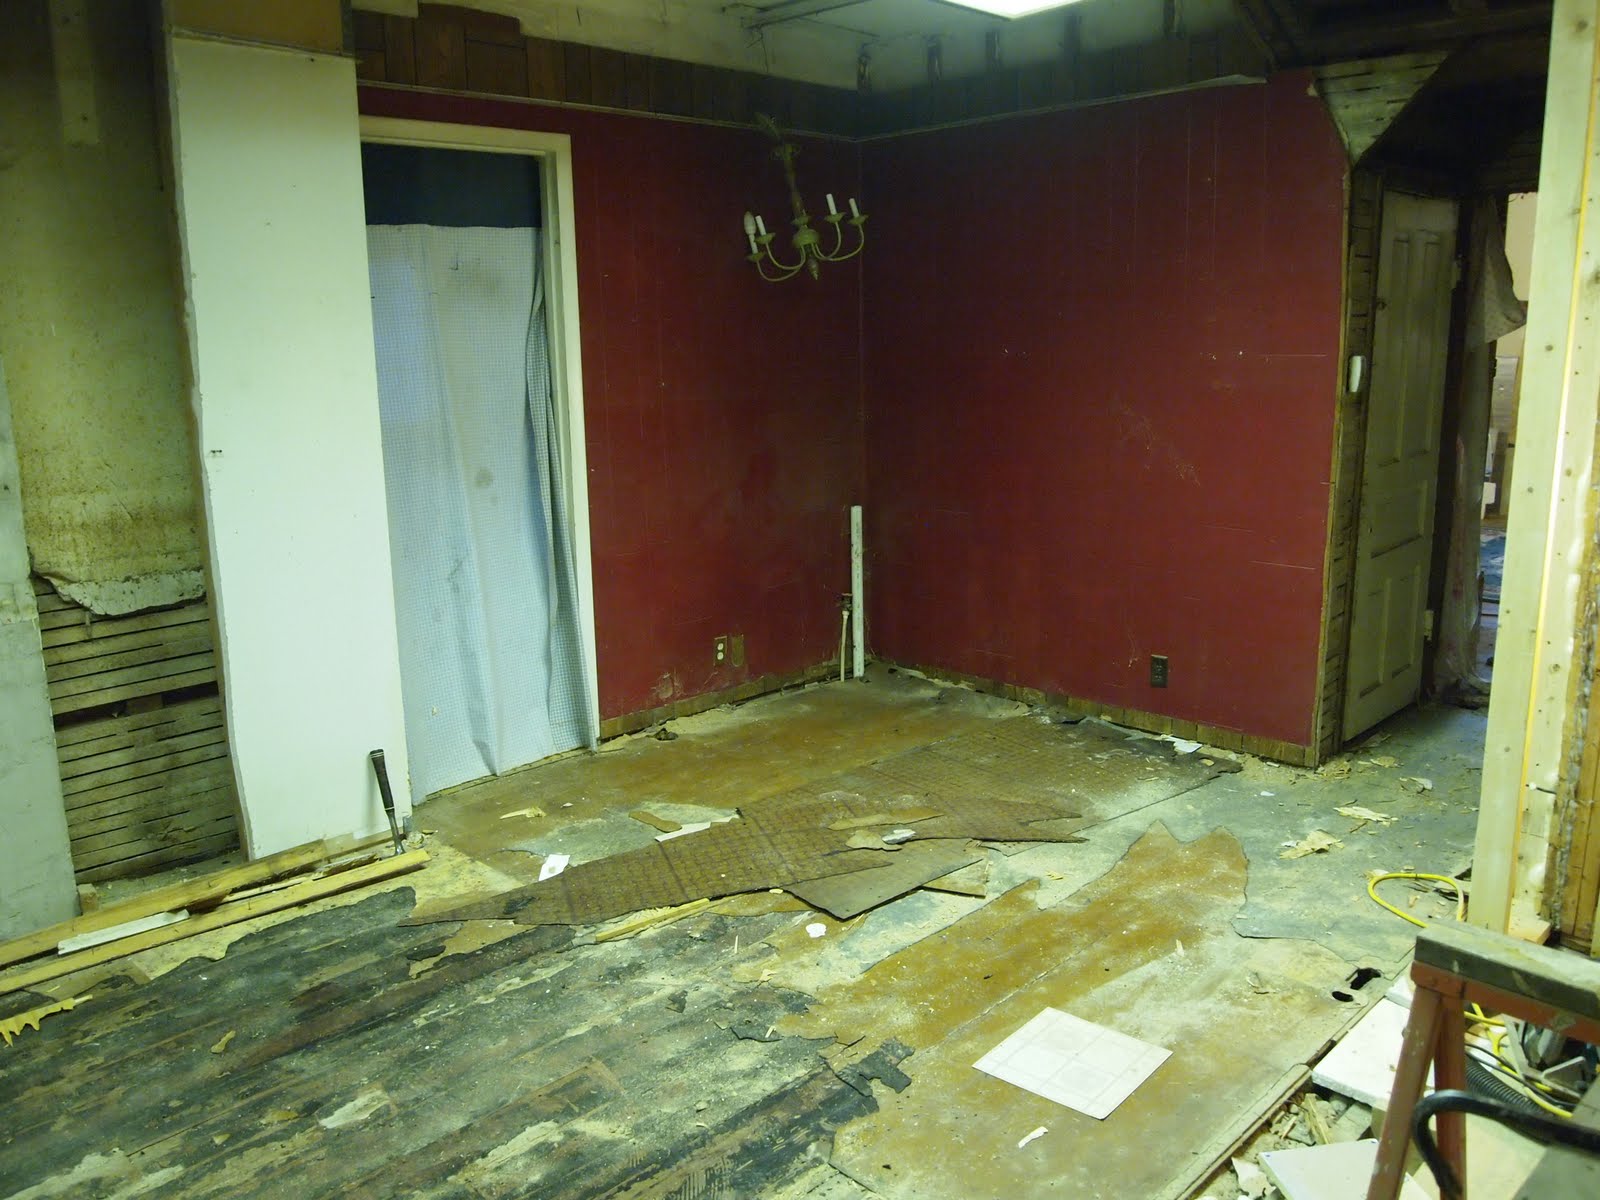
And looking into the north east corner:

 We got this area down to the plank floor. From here we just build up.
There was one piece of flooring that didn't quite get pulled up (yet) in the corner.
 It's amazing how high that step feels. (It's probably about 1.5".) We all laughed on Wednesday that the ceiling got quite a bit higher. There were a lot of layers on that floor, including a section of paneling. Yes, paneling on the floor. The house really needs a rescuing from its previous renovations.
Troy and David also found a wide gap between the kitchen and hallway to the dining room:
It's almost 4" wide, goes straight down to the basement. It was covered with a piece of trim. You know, why make something solid when trim will put it out of sight? Yup, this renovation project is a rescue mission.
All the layers of linoleum were somewhat interesting. Obviously there was an aqua and white check pattern at some point:
 It was painted with at least two different colours.
The back of one of the layers had this basket weave pattern:
 Was there ever a time when they sold two-sided linoleum? Stores could stock half as much inventory with that system.
It's a big pain in the butt and a lot of time and work, but it does feel good to rip out all this crap and start "fresh" and right. (Yes, Troy feels very strongly about how you do and do not fix/remodel a house. It is a moral issue as far as he is concerned.)
We will be busy for the next while bagging the trash (thankfully today is trash day) and cutting stuff up into manageable pieces. And ripping up that last bit of diarrhea brown painted linoleum. Why would anyone ever?
Why?
Looking into the southeast corner before we started:

And looking into the north east corner:


There was one piece of flooring that didn't quite get pulled up (yet) in the corner.

Troy and David also found a wide gap between the kitchen and hallway to the dining room:
All the layers of linoleum were somewhat interesting. Obviously there was an aqua and white check pattern at some point:

The back of one of the layers had this basket weave pattern:

It's a big pain in the butt and a lot of time and work, but it does feel good to rip out all this crap and start "fresh" and right. (Yes, Troy feels very strongly about how you do and do not fix/remodel a house. It is a moral issue as far as he is concerned.)
We will be busy for the next while bagging the trash (thankfully today is trash day) and cutting stuff up into manageable pieces. And ripping up that last bit of diarrhea brown painted linoleum. Why would anyone ever?
Why?
Friday, March 11, 2011
Journey of a Thousand Paper Cuts
Oh wait, that's not how that goes, is it?
In any case, we continue to take steps to getting the kitchen done. Troy is this far on the floor joists and insulation:
 Less than half way. The third one is lower because that is where the plumbing for the sink will go.
One thing that I helped with last weekend was putting one-inch foam in the bays of the outside walls.
 Troy doesn't want the cellulose insulation sitting directly on the concrete floors because IF the concrete ever gets wet it will transfer to the cellulose and do bad things. With the foam insulation, the dampness won't be able to get to the insulation.


In any case, we continue to take steps to getting the kitchen done. Troy is this far on the floor joists and insulation:

One thing that I helped with last weekend was putting one-inch foam in the bays of the outside walls.


I did a very good job, I must say! ;-)
A final "big picture" view:

Saturday, March 05, 2011
Simple Update

But we're not surprised, are we? We know Troy does good work.
The week I was gone, Troy poured the first half. He said it went quite well by himself.

The next week, he did the second half with only minimal help from me:

It was a lot closer than he expected on the gravel; there wasn't much left by the time the slab was done. But all we really needed was enough and we had it.
We cleaned up the tools and cement mixer by 10:00 that night (and it was a cold and rainy night, too) and the slab was finished!!
This week we have had pressure treated 2x8s stacked in the kitchen drying out. When Troy bought them, he wondered if they would be stored outside and wet. He was so happy to be directed to the covered storage area to load them up. Well, apparently they had just been moved there because they were wet and frozen. (He had a horrible time tying them into the truck because they were so slippery!)
A week with fans on them has fixed them right up.
Troy has the first floor joists in and one bay filled with foam insulation. Go, Troy, go!
Wednesday, January 26, 2011
Sledgehammer vs Concrete

Tonight I hauled buckets while Troy whacked apart the concrete with a sledgehammer. He's discovered that the sledgehammer is faster than the jackhammer. More work, but faster. So out with the jackhammer!

For some reason I had the idea that I would be waiting for Troy--that I would be able to haul and dump the buckets faster than he could fill them. That was wrong.
As I realized this, I didn't think I was going to be able to keep up the pace. The buckets were already a little heavier than I could manage to do all night, and if I didn't fill them as much, there was no way I could keep up with Troy.
Then I walked into the kitchen and saw Troy leaning on his sledgehammer breathing hard, and he said, "I don't think I can keep up with you, honey." Ha ha ha. We weren't competing, but obviously we were pushing each other all the same!!
We both managed to keep going and put in an hour or so. A couple more nights like that and the concrete should be out.
Wow. It seems so easy when you write about it.
Tuesday, January 11, 2011
The turning point on the kitchen, and, how cement sucks as an insulator.

In order to isolate the cement floor/slab from the living space, I have to "lower" the surface of the cement about eight inches. Then I can put 2 x 8's in there, with room for foam insulation board, and room for plumbing drains and whatnot. My first exploratory hole revealed the best possible news, a thin hard 3" shell of good quality cement, over good gravel fill. I was concerned that maybe they had poured one gigantic block of solid concrete, which would have been tedious in the extreme to "lower" eight inches.
So, I have to make a defining cut around the perimeter, leaving my solid hard old concrete for the new inner wall to stand on. We do this with a diamond edged cement blade in our cheapo Harbor Freight circular saw, cutting about an inch deep. Don't use your nice Makita saw for this, since it will be inhaling abrasive dust into the motor the whole time. Ideally, you have somebody standing right there with a shop vac, with the nozzle sucking up 90% of the dust since it makes copious clouds of it. And use a respirator/mask, since you don't want silicosis.
Once we make that defining cut, then we break out the cement inside, and also dig out the gravel until we have a nice flat base to pour our new concrete on. This will be precisely leveled using a water level, the best thing since sliced bread.
Or you can make one by buying 25 feet of 3/8" vinyl clear tubing, and affixing it to a plastic quart jar some how, but the vinyl tubing alone was about half the cost of the whole finished product, so I just bought it. Great precision, only needs one person to operate. Works around corners (which laser levels can't). Setup time is about a minute. Slick product and pretty cheap.
We will reuse the gravel to make the new cement. Once we pour the new recessed or sunken floor at the precise correct height, we add our new floor framing. This will beautifully line up with the height of the main floor, removing the 2 1/2" tilt we had in the old floor. We will redeem this old house in every way that we can. As usual, redemption is an expensive and time consuming process. And worth every bit of it.
Excuse me while I go make a mess...


Sunday, January 09, 2011
Two Things of Note
First I should say that Troy and I finished up the support beam this week by adding the 2x10s to each side. He has worked on making a place for the upright supports to rest on. (You're not surprised to hear that what was there was completely inadequate, right?)
While he was cleaning up the beam, this happened:
 Troy, 1; hammer, 0. Fortunately, nothing actually went flying and Troy was not hurt.
THE OTHER THING OF NOTE IS THAT TROY STARED ON THE FLOOR TONIGHT. Oh sorry, I don't have to yell when I'm typing, do I?
 It's been a little loud, but well worth it.
 I'm going to let Troy give you all the details so look for a post from him soon.
While he was cleaning up the beam, this happened:

THE OTHER THING OF NOTE IS THAT TROY STARED ON THE FLOOR TONIGHT. Oh sorry, I don't have to yell when I'm typing, do I?


Saturday, July 31, 2010
The joys of fixing mistakes in cement.
I made a mistake when I designed the cement floor of the 30 x 70 shop. This is not really surprising since I am almost a rank amateur. And even the pro's slip up and have to take remedial action once in a while.
I had this great idea for the slab at the "garage" end of the shop. Vehicles, especially in the winter, bring in ice and snow and water and generally make a mess. My idea was to put a drain in the floor and slope the cement toward the drain. Poof, self cleaning floor. The water would magically take care of itself. And it does that admirably.
The problem is, there is about 15" of cement floor that sticks out past the big roll-up garage door. Since it is outside, yet slopes toward the drain, which is inside, it funnels rain water inside the building. Every time it rains or snows, this moisture migrates inside and gets the sill plates and drywall wet immediately adjacent to the door.
Drywall can't stand much water, and wood framing isn't improved by getting repeatedly wet either, even though it is pressure treated to resist rot and so on.
This simply will not do. So, how shall we fix this little error in judgement?
Shave a little bit of the cement off, to make it drain away to the outside, where it belongs. They make a special, diamond coated cement blade that you install on a circular saw, like so:

And, since I have a 16 year old son who needs money for college:

We made a deal. Here is the result. A bunch of slots cut in the cement. We made a wedge shaped jig for the saw to run on, to control the depth of the slot. So instead of sloping to the inside at 1/2" per foot, it now slopes to the outside at 3/4" per foot. We will have to remove all the little cement bits between every kerf.

 Fortunately, I happen to own an electric jackhammer. Here's a little video clip of the bits flying off under the ministrations of the beast. It is the heaviest "portable" tool I own.
It's too bad our little Nikon CoolPix camera doesn't record any sound with the video clips, since the jackhammer makes the most satisfying chunkchunkchunkchunkchunkchunkchunkchunkchunkchunk sound. While it was handy to have the jackhammer, a plain old six dollar hammer and a two dollar chisel would have done the same thing in a couple of hours (instead of 20 minutes).
Here it is after removing all the bits. You can sort of make out that it now slopes away from the building instead of into the building.

Here's a close up. We (by we, I mean my 16 year old son) did some grinding to knock off the high spots so I can run a snow shovel over this part without snagging the rough surface too much. This is before the treatment with the grinder so it looks a bit rough.
 It has now rained several times, and the shop has remained satisfyingly dry. If we keep our framing dry, replace the roof every 25-30 years, replace the siding every fifty years or so, we have every reason to think this superinsulated, ultra-energy-conserving building will still be saving energy 100-200 years from now. It is incumbent upon us to stop thinking about what a building or house will cost to purchase or build and live in for 5 years, or even 20 years. We must start thinking about lifetime energy use for heating and cooling, and the cost of energy to replace a building (embodied energy).
After all, the resources do not belong to me, or to you, they belong to the Master and Creator of the universe. I am just a steward.
Finest regards,
troy
I had this great idea for the slab at the "garage" end of the shop. Vehicles, especially in the winter, bring in ice and snow and water and generally make a mess. My idea was to put a drain in the floor and slope the cement toward the drain. Poof, self cleaning floor. The water would magically take care of itself. And it does that admirably.
The problem is, there is about 15" of cement floor that sticks out past the big roll-up garage door. Since it is outside, yet slopes toward the drain, which is inside, it funnels rain water inside the building. Every time it rains or snows, this moisture migrates inside and gets the sill plates and drywall wet immediately adjacent to the door.
Drywall can't stand much water, and wood framing isn't improved by getting repeatedly wet either, even though it is pressure treated to resist rot and so on.
This simply will not do. So, how shall we fix this little error in judgement?
Shave a little bit of the cement off, to make it drain away to the outside, where it belongs. They make a special, diamond coated cement blade that you install on a circular saw, like so:

And, since I have a 16 year old son who needs money for college:

We made a deal. Here is the result. A bunch of slots cut in the cement. We made a wedge shaped jig for the saw to run on, to control the depth of the slot. So instead of sloping to the inside at 1/2" per foot, it now slopes to the outside at 3/4" per foot. We will have to remove all the little cement bits between every kerf.


It's too bad our little Nikon CoolPix camera doesn't record any sound with the video clips, since the jackhammer makes the most satisfying chunkchunkchunkchunkchunkchunkchunkchunkchunkchunk sound. While it was handy to have the jackhammer, a plain old six dollar hammer and a two dollar chisel would have done the same thing in a couple of hours (instead of 20 minutes).
Here it is after removing all the bits. You can sort of make out that it now slopes away from the building instead of into the building.

Here's a close up. We (by we, I mean my 16 year old son) did some grinding to knock off the high spots so I can run a snow shovel over this part without snagging the rough surface too much. This is before the treatment with the grinder so it looks a bit rough.

After all, the resources do not belong to me, or to you, they belong to the Master and Creator of the universe. I am just a steward.
Finest regards,
troy
Subscribe to:
Posts (Atom)