Troy has been working on the trim on the kitchen island over the last few weeks. When he put it on the other counters, he stained it before he installed it. He found that it got a little too abused during the installation and then needed to be touched up, so this time he installed it first and stained it in place. It worked pretty well.
He went ahead and did the nails the "right way" and countersunk them and filled in the holes with wood filler, but he actually likes the look of the flush nails on the counter trim better. He thinks that besides being more work, this looks more obvious and actually detracts more. Live and learn.
Once his trim was stained and urethaned, I was up for grouting. I didn't get to it for about a week and then was sick with a cold this week (a good excuse), but this morning I got to it. I pulled a Troy and fit it into a tight space before going to the ND game today.
Took about an hour and a half from start to finish (including clean up, of course), and it looks great (in my opinion). Although I was afraid the grout would emphasize the uneven spacing, it really just brings everything together. I also was a little unsure about the colour because I thought I wanted something more red to make it look like one piece. I couldn't find red and went with this bone or beige colour (I forget) because it matched the veins pretty well. Or I thought it would. It's not like I had the actual tiles with me in the store (they vary a lot anyway) and it's a little hard to get a feel for the colour from a tiny square swatch on the bag. But it worked out; it's good.
In this picture you can see how the finish is already failing (middle left of picture). We don't know what has affected the tile (tomatoes, a juice, water???) but this kind of "clouding" has turned up in a couple locations. I've come to grips with it...and some day we'll figure out how to refinish the tiles and fix it. But it will just happen again, so I'm not going to get too uptight about it. (I'm not. Really.)
Having accomplished that, I set off to meet Troy for the game. A bit of a dull go for a while but ended with a pretty exciting fourth quarter and triple overtime, with the final result of a win and 9-0 for the season! Go Irish!
Final score (finally!)
Happy fans:
The process of converting a lovely old farmhouse into an efficient cheap-to-heat comfortable home and the life we lead while doing it.
Showing posts with label tile. Show all posts
Saturday, November 03, 2012
Saturday, September 29, 2012
Progress in the Kitchen
Things have been slow going ("no" going) in the kitchen so I decided to put up a list to help get us focused.
That took about three weeks to get done. To make sure I didn't miss anything, I looked for our last list. It was this one from November 2011. I was happy to see how much of the old list we have gotten done. Other items have been postponed for much later (like flooring).
Last weekend I got the grout sealed (finally). First thing I could cross off the list. Since I had pulled out the stove, I had Troy help me level it. Next thing off the list.
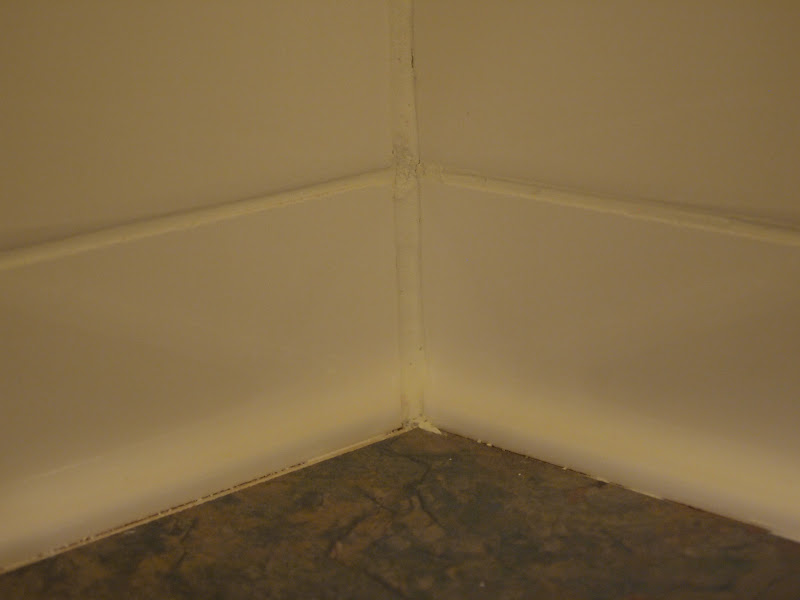
Just today Troy laid down the caulk at the base of the tile.
He does a good job! Makes it look "finished." And of course, one more thing off the list.
And you might notice a check mark on the list. I do that when I work on something, but it's not done yet. Today I started painting a pair of these light fixtures that will go above the island.
They sort of match the hanging fixture that will go above the table, and I found them at a yard sale. ($5 for the pair.) I want them yellow, but not this 70s yellow, so I am spraying them a very bright sunny yellow. I really worried and fretted about how I was going to get into all those curves, and finally decided to just start. Do what you can do and then see where you're at. So far, so good, I think. I'm working in the shop and there wasn't a lot of light by the time I did the last coat for today. I'll see tomorrow.
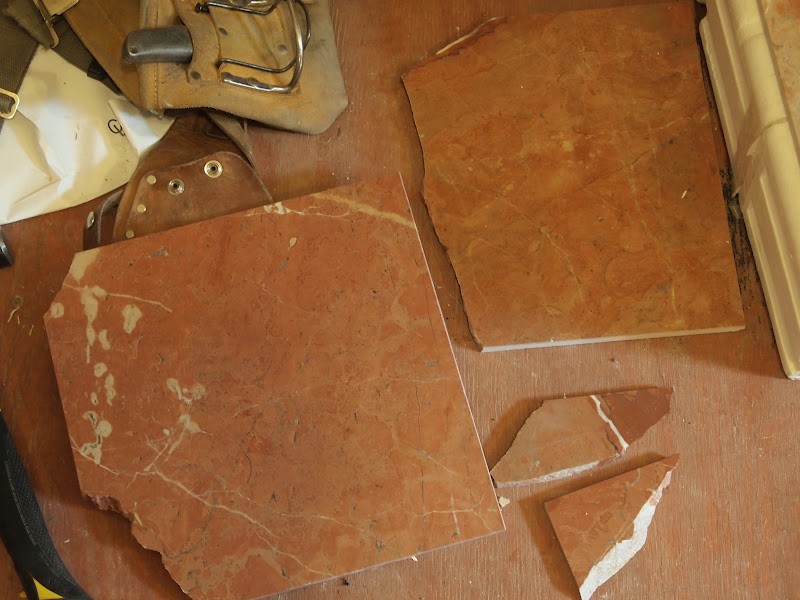
Another thing I did today was to cut up the leftover/broken marble tiles. They've been sitting around for far too long.
These are the ones that survived the cutting. I was going to just glue some felt on the bottom, but I think I have to sand the cut edges a little. They all are between 4 to 6 inches square. If you are interested in having one for a trivet (or anything else), let me know. I have more than I need, for sure.
That took about three weeks to get done. To make sure I didn't miss anything, I looked for our last list. It was this one from November 2011. I was happy to see how much of the old list we have gotten done. Other items have been postponed for much later (like flooring).
Last weekend I got the grout sealed (finally). First thing I could cross off the list. Since I had pulled out the stove, I had Troy help me level it. Next thing off the list.
Just today Troy laid down the caulk at the base of the tile.
He does a good job! Makes it look "finished." And of course, one more thing off the list.
And you might notice a check mark on the list. I do that when I work on something, but it's not done yet. Today I started painting a pair of these light fixtures that will go above the island.
They sort of match the hanging fixture that will go above the table, and I found them at a yard sale. ($5 for the pair.) I want them yellow, but not this 70s yellow, so I am spraying them a very bright sunny yellow. I really worried and fretted about how I was going to get into all those curves, and finally decided to just start. Do what you can do and then see where you're at. So far, so good, I think. I'm working in the shop and there wasn't a lot of light by the time I did the last coat for today. I'll see tomorrow.
Another thing I did today was to cut up the leftover/broken marble tiles. They've been sitting around for far too long.
These are the ones that survived the cutting. I was going to just glue some felt on the bottom, but I think I have to sand the cut edges a little. They all are between 4 to 6 inches square. If you are interested in having one for a trivet (or anything else), let me know. I have more than I need, for sure.
Sunday, June 17, 2012
It's True: You Do Need to Watch Out for the Slippery Slope
Today Troy installed a new blade on the tile saw. You know what that means? I did some cutting.
Things didn't start so well; I had another tile break, but I told myself I just have to keep going. I put painters tape around the tiles next to the cuts to try to stabilize the tile but I'm not sure it helped at all. The cracks didn't appear to follow the veins you could see on the front, but rather they followed cracks you could see from the back.
The last of the four tiles I cut had a corner break away when I peeled away the tape. When I realized it was going to be under the sink edge, I decided I was just going to use it. (First step down the slope.)
So you can see it now, but once the sink is in place, it should be completely covered. I figured I could live with that.
Then the third tile I laid cracked as I was putting it into place. I had had enough by then and decided I was going to put both pieces in the best I could and call it good.
I know, it looks pretty noticeable, but if I pull back a little bit and show the whole tile:
it's not nearly so obvious. (Right?) (Foot is sliding...can't keep from going down...)
The second last tile I put in--and my favourite--cracked as I was pressing it into place. I decided I couldn't live with that and replaced it with the last tile I had. It was my least favourite (naturally, that's why it wasn't being used). (Resisting the pull down that slope.)
Finally, the last tile I laid cracked as I was pushing it down. (You would think that I would learn, but I really didn't think I was pushing hard.) I didn't notice the crack at first, but knew something wasn't right when I noticed the tile was bowing up in the center of one edge. Tile normally doesn't bend.
This is a lot less noticeable as the tile was pretty much in place before it cracked. And I left it there. (The bump you just heard was me hitting the bottom of the slope.)
So, my apologies to all the members of the "perfection club"--I am not going to qualify. On the other hand if you apply the standard from the quilting community (that is, Can you see it from a galloping horse?), I think we're doing alright:
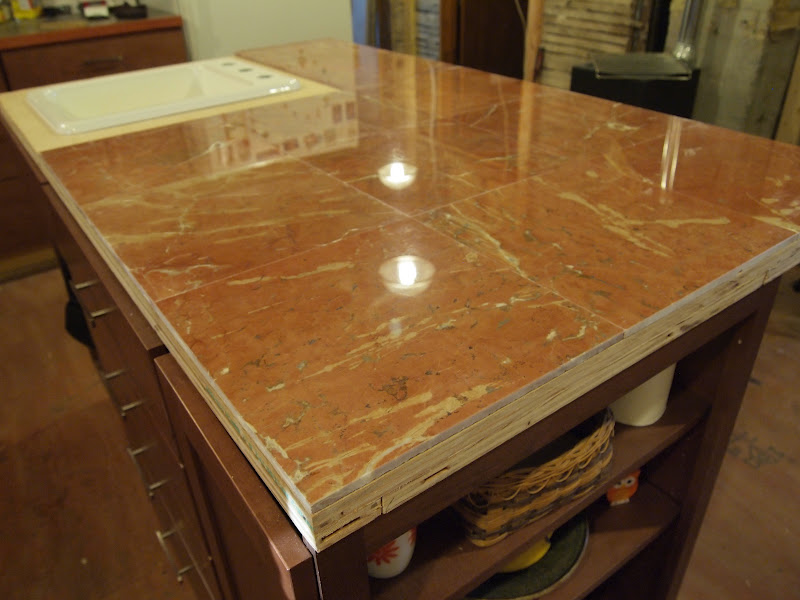
In any case, it is done. Next step is for Troy to apply the wood trim to the edge. I've noticed a chip on the one corner already:
so we have to get the edges protected pronto. He had trim pieces purchased already (a bit of a hassle since Menards only had warped ones left and wasn't going to order more until those had sold) but after I laid the initial tiles, he realized it wasn't going to be wide enough. Guess what? Tile on thinset is a lot taller than Formica! Who would have guessed.
Once that is done, I will grout and then the sink can go in. I can't wait.
P.S.: If you have a spouse and they are working on a project that is really not going that well, telling them that if things really don't work out you can always remove everything you've done and start over and that this is no great loss is not really a very helpful or comforting thing to say. Just in case you were wondering. (I will leave comments open in case one certain spouse is going to try to defend himself.)
Things didn't start so well; I had another tile break, but I told myself I just have to keep going. I put painters tape around the tiles next to the cuts to try to stabilize the tile but I'm not sure it helped at all. The cracks didn't appear to follow the veins you could see on the front, but rather they followed cracks you could see from the back.
The last of the four tiles I cut had a corner break away when I peeled away the tape. When I realized it was going to be under the sink edge, I decided I was just going to use it. (First step down the slope.)
So you can see it now, but once the sink is in place, it should be completely covered. I figured I could live with that.
Then the third tile I laid cracked as I was putting it into place. I had had enough by then and decided I was going to put both pieces in the best I could and call it good.
I know, it looks pretty noticeable, but if I pull back a little bit and show the whole tile:
it's not nearly so obvious. (Right?) (Foot is sliding...can't keep from going down...)
The second last tile I put in--and my favourite--cracked as I was pressing it into place. I decided I couldn't live with that and replaced it with the last tile I had. It was my least favourite (naturally, that's why it wasn't being used). (Resisting the pull down that slope.)
Finally, the last tile I laid cracked as I was pushing it down. (You would think that I would learn, but I really didn't think I was pushing hard.) I didn't notice the crack at first, but knew something wasn't right when I noticed the tile was bowing up in the center of one edge. Tile normally doesn't bend.
This is a lot less noticeable as the tile was pretty much in place before it cracked. And I left it there. (The bump you just heard was me hitting the bottom of the slope.)
So, my apologies to all the members of the "perfection club"--I am not going to qualify. On the other hand if you apply the standard from the quilting community (that is, Can you see it from a galloping horse?), I think we're doing alright:
In any case, it is done. Next step is for Troy to apply the wood trim to the edge. I've noticed a chip on the one corner already:
so we have to get the edges protected pronto. He had trim pieces purchased already (a bit of a hassle since Menards only had warped ones left and wasn't going to order more until those had sold) but after I laid the initial tiles, he realized it wasn't going to be wide enough. Guess what? Tile on thinset is a lot taller than Formica! Who would have guessed.
Once that is done, I will grout and then the sink can go in. I can't wait.
P.S.: If you have a spouse and they are working on a project that is really not going that well, telling them that if things really don't work out you can always remove everything you've done and start over and that this is no great loss is not really a very helpful or comforting thing to say. Just in case you were wondering. (I will leave comments open in case one certain spouse is going to try to defend himself.)
Monday, June 04, 2012
Further Disaster Leads to Further Delay
This is how we left the island tile when last we spoke.
On Sunday I ramped myself up to get the rest of it done. I marked all the tile and then took out one of the broken tiles to practice on. Just to see if it was any different than cutting the porcelain tiles. (I've never done this before; what do I know?)
This one came out quite good. You can see I have two nice 6" squares out of the tile. They'll make pretty (and hefty) trivets.
Then I went to cut the first tile I would have to use, and suddenly CHINK:
There it went. The tile cracked along a vein (I assume), right across the part that I needed to not crack. That is when I stopped. I wasn't pushing too fast (I thought), so I didn't know what to do to make the next one not do the same thing. I did do some rearranging of the tiles (the few I have left) and made it so I'm cutting the less veined tiles.
We're going to get a new blade and see if that will help. But that means it's not getting done this week. If you have any tips, let me know.
I have two spares still I think, but if I go over that, I will have to buy another box of ten and that will hurt with a capital $.
On Sunday I ramped myself up to get the rest of it done. I marked all the tile and then took out one of the broken tiles to practice on. Just to see if it was any different than cutting the porcelain tiles. (I've never done this before; what do I know?)
This one came out quite good. You can see I have two nice 6" squares out of the tile. They'll make pretty (and hefty) trivets.
Then I went to cut the first tile I would have to use, and suddenly CHINK:
There it went. The tile cracked along a vein (I assume), right across the part that I needed to not crack. That is when I stopped. I wasn't pushing too fast (I thought), so I didn't know what to do to make the next one not do the same thing. I did do some rearranging of the tiles (the few I have left) and made it so I'm cutting the less veined tiles.
We're going to get a new blade and see if that will help. But that means it's not getting done this week. If you have any tips, let me know.
I have two spares still I think, but if I go over that, I will have to buy another box of ten and that will hurt with a capital $.
Monday, May 28, 2012
A Little Disaster, A Little Tiling
I have kept myself fairly busy this weekend. A lot of sewing, I have to admit, but I put today aside for "house" work and wood. I split wood for a while this morning before it got too, too hot and while the splitter was in the shade. I am making good progress on the last rack.
When I couldn't take it anymore, I went in and (after some recovery) decided I could tackle the marble tile on the island. I wasn't committing to cutting the tiles at the north end (too much set up...I couldn't even think about it), but I thought I could at least get it started. And that's what I did.
First I took out the sink so that I wouldn't damage it. (And just in case I went crazy and did manage to cut the tile to fit around the hole.) Then I started to remove tiles and lay them in the foyer so I could finalize the layout. I removed tiles from the west side and as I got most of them removed, the weight of the tiles on the overhanging edge made the whole counter tip up and dump the remaining tiles on the floor!! Aaahhhh....quelle disastre!!
Fortunately nothing landed hard on my toes, but I did lose two of the three tiles that fell. (I think I managed to hang on to one of them.)
On the bright side, I have some tiles I can practice my cutting on to see if it's any different than cutting porcelain and I have some smaller pieces in case I need to bring a colour sample to match something. Yes, let's look for silver linings.
The real silver lining is that I still had enough tiles with four good clean corners (I have quite a number with one damaged corner) with one left over so I felt like I had some choice of which pieces to use.
I went and found Troy and pulled him in from the field where he was discing (or something) in his little field. He was gracious enough to come in right away and fasten down the counter. Once that was done, I dove in.
I got the nine tiles in the main part put in and that's about where I ran out of energy and ran out of tile adhesive. So that was it for the day.
I was worried about getting all the corners to match but I think I did pretty well. I was also worried about matching the height of the tiles because they're quite uneven. That was not quite a successful, but will have to do. We still haven't decided what we're doing about sealing the cracks. Troy is not so keen on silicone suddenly and I can't find red grout. If you have any suggestions, let me know!
Troy has not been doing too much in the kitchen since spring has sprung and he felt the pressure of working on his garden.
On the good side, it is looking wonderful this year. So neat and orderly and weed free.
He abandoned last year's pretense of "not doing a garden" and has planted lots and lots. I think it's all in the ground now. Broccoli, cauliflower, popping corn, sweet corn, meal corn, parsnips, potatoes, peas, tomatoes, mildish peppers, and maybe I've forgotten some. He's putting carrots in in July. He has been visiting the local town compost supply (from leaf collection primarily) and picking up loads in his pickup truck. Then it seems to be a race of when he can empty the load and get another one!
He also has gotten the sprinkler system up and running this year which is good with the weather we've been having...crazy hot!
When I couldn't take it anymore, I went in and (after some recovery) decided I could tackle the marble tile on the island. I wasn't committing to cutting the tiles at the north end (too much set up...I couldn't even think about it), but I thought I could at least get it started. And that's what I did.
First I took out the sink so that I wouldn't damage it. (And just in case I went crazy and did manage to cut the tile to fit around the hole.) Then I started to remove tiles and lay them in the foyer so I could finalize the layout. I removed tiles from the west side and as I got most of them removed, the weight of the tiles on the overhanging edge made the whole counter tip up and dump the remaining tiles on the floor!! Aaahhhh....quelle disastre!!
Fortunately nothing landed hard on my toes, but I did lose two of the three tiles that fell. (I think I managed to hang on to one of them.)
On the bright side, I have some tiles I can practice my cutting on to see if it's any different than cutting porcelain and I have some smaller pieces in case I need to bring a colour sample to match something. Yes, let's look for silver linings.
The real silver lining is that I still had enough tiles with four good clean corners (I have quite a number with one damaged corner) with one left over so I felt like I had some choice of which pieces to use.
I went and found Troy and pulled him in from the field where he was discing (or something) in his little field. He was gracious enough to come in right away and fasten down the counter. Once that was done, I dove in.
I got the nine tiles in the main part put in and that's about where I ran out of energy and ran out of tile adhesive. So that was it for the day.
I was worried about getting all the corners to match but I think I did pretty well. I was also worried about matching the height of the tiles because they're quite uneven. That was not quite a successful, but will have to do. We still haven't decided what we're doing about sealing the cracks. Troy is not so keen on silicone suddenly and I can't find red grout. If you have any suggestions, let me know!
Troy has not been doing too much in the kitchen since spring has sprung and he felt the pressure of working on his garden.
On the good side, it is looking wonderful this year. So neat and orderly and weed free.
He abandoned last year's pretense of "not doing a garden" and has planted lots and lots. I think it's all in the ground now. Broccoli, cauliflower, popping corn, sweet corn, meal corn, parsnips, potatoes, peas, tomatoes, mildish peppers, and maybe I've forgotten some. He's putting carrots in in July. He has been visiting the local town compost supply (from leaf collection primarily) and picking up loads in his pickup truck. Then it seems to be a race of when he can empty the load and get another one!
He also has gotten the sprinkler system up and running this year which is good with the weather we've been having...crazy hot!
Sunday, May 06, 2012
Tile...done.
I have very exciting news. Saturday I finished grouting all the tile of the back splash in the kitchen. See? Very exciting!
I have to apologize for the way I'm going to tell you about it because I'm watching a new episode of Sherlock and am completely distracted.
You may recall that I got the north wall done a couple weeks ago.
I knew I had to the next wall in one push and so I started early (ha ha...I started at 11:00) and worked for six hours straight.
With the radio on, I set up, cleared counters, laid drop cloth, switched off the electricity, removed the under cabinet radio and laid tape straight through Wait Wait. I mixed grout and started applying it through Splendid Table and then three hours of the Blues with Ole Harv. I hate that show but I was too busy to find something else to listen to. (And working in silence, isn't an option.) By the time This American Life came on at 4, I knew I had it beat and was winding down. Still an amazing amount of clean up and putting things together.
When Troy came home, everything was back in place and you couldn't even tell that I had done anything. Except that the gaps between the tile were gone, of course!
It looks ok, but mostly I'm just glad it's done. It's now up to Troy to put Silicone down between the tile and the counter and in a couple weeks I'll have to seal the grout. I got a spray can that's supposed to make it easy. We'll see.
Meanwhile I will enjoy being able to put things out on the counter. I've been keeping them clear because I knew they would be in my way. Now I can put some pops of colour in front of that white background.
Next up besides maybe a small break? The curtains.
I've been thinking of them for a while but told myself I couldn't work on them until I got the tile done. And guess what...it's done!
I will be so happy to get rid of this old thing. I took an old piece of fabric, sewed a pocket into the top and am still stuck with it years later! I picked up some very cute fabric last summer when I was in Missouri and I can't wait to see it up. I considered a roman shade, but I think I'm going with a roller blind. I'll let you know...when I get to it...
I have to apologize for the way I'm going to tell you about it because I'm watching a new episode of Sherlock and am completely distracted.
You may recall that I got the north wall done a couple weeks ago.
I knew I had to the next wall in one push and so I started early (ha ha...I started at 11:00) and worked for six hours straight.
With the radio on, I set up, cleared counters, laid drop cloth, switched off the electricity, removed the under cabinet radio and laid tape straight through Wait Wait. I mixed grout and started applying it through Splendid Table and then three hours of the Blues with Ole Harv. I hate that show but I was too busy to find something else to listen to. (And working in silence, isn't an option.) By the time This American Life came on at 4, I knew I had it beat and was winding down. Still an amazing amount of clean up and putting things together.
When Troy came home, everything was back in place and you couldn't even tell that I had done anything. Except that the gaps between the tile were gone, of course!
It looks ok, but mostly I'm just glad it's done. It's now up to Troy to put Silicone down between the tile and the counter and in a couple weeks I'll have to seal the grout. I got a spray can that's supposed to make it easy. We'll see.
Meanwhile I will enjoy being able to put things out on the counter. I've been keeping them clear because I knew they would be in my way. Now I can put some pops of colour in front of that white background.
Next up besides maybe a small break? The curtains.
I've been thinking of them for a while but told myself I couldn't work on them until I got the tile done. And guess what...it's done!
I will be so happy to get rid of this old thing. I took an old piece of fabric, sewed a pocket into the top and am still stuck with it years later! I picked up some very cute fabric last summer when I was in Missouri and I can't wait to see it up. I considered a roman shade, but I think I'm going with a roller blind. I'll let you know...when I get to it...
Sunday, April 22, 2012
No More Qualifiers
The last while, whenever anyone asked about the kitchen, I would happily say, "The tile's almost done." But then I'd have to add, "I just have to do a little bit around the window."
This little bit:
"Just a little bit around the window." I was so tired of saying that qualifier.
So today I made it my first job to get it done. I was able to set up the tile saw outside on the porch and that made clean up easier. (Although it sure was colder than it looked!) And it sure didn't make all those cuts easier. Every freaking tile needed at least one cut. It was a slog, but I got it done:
And so I give you a kitchen with all the backsplash tiles up on the walls.
Woo hoo!
I had about five minutes of celebrating and feeling good about myself before pressure about getting the grout done started... #alwayssomething
This little bit:
"Just a little bit around the window." I was so tired of saying that qualifier.
So today I made it my first job to get it done. I was able to set up the tile saw outside on the porch and that made clean up easier. (Although it sure was colder than it looked!) And it sure didn't make all those cuts easier. Every freaking tile needed at least one cut. It was a slog, but I got it done:
And so I give you a kitchen with all the backsplash tiles up on the walls.
Woo hoo!
I had about five minutes of celebrating and feeling good about myself before pressure about getting the grout done started... #alwayssomething
Thursday, April 05, 2012
Seeing Red
While I was waiting for dinner to cook tonight, I decided to clear all the junk off the island and take a look at the red marble I picked up last week.
You know, just to make sure they were all there...
See what they looked like...
Try them out...
I may have been swept into a vortex of red marble, and not been able to free myself...
It's very beguiling...
I ended up "dry fitting" the counter with the tiles that would fit.
Handling the tile and seeing how it looks has given me a profound sense of my inadequacy and inexperience. I am convinced I do not have the skills to do this right. But the bull headedness to try it anyway.
Troy did not temper my feelings by coming home, looking at the counter, and saying "Wow! That's too fancy for us." Yes, this tile is out of our league. But we'll try to measure up.
You know, just to make sure they were all there...
See what they looked like...
Try them out...
I may have been swept into a vortex of red marble, and not been able to free myself...
It's very beguiling...
I ended up "dry fitting" the counter with the tiles that would fit.
Handling the tile and seeing how it looks has given me a profound sense of my inadequacy and inexperience. I am convinced I do not have the skills to do this right. But the bull headedness to try it anyway.
Troy did not temper my feelings by coming home, looking at the counter, and saying "Wow! That's too fancy for us." Yes, this tile is out of our league. But we'll try to measure up.
Sunday, March 18, 2012
With Practice I Get Slower?
I worked on the tile for about five hours today and feel like I have very little to show for it.
To give you a comparison, this is where I left off last time:
Now I have the bottom part done to the right edge of the stove:
Here's a better view behind the stove:
The tile stops at the level of the counter.
Not only did it take a long time, but most of it will not even be seen because it is behind the stove! Gah.
I didn't think there was that much cutting, but I guess there was enough to slow me down. Plus having to work behind the stove did cost me some time too. Oh yeah, and unscrewing all the electrical outlets and light switches. Ah ha...things are starting to make sense now.
Part way through the afternoon I thought I could get the tile done in two more sessions. Now I am not so sure.
But it's still progress, I'm not actually going backwards. Something to cling to.
To give you a comparison, this is where I left off last time:
Now I have the bottom part done to the right edge of the stove:
Here's a better view behind the stove:
The tile stops at the level of the counter.
Not only did it take a long time, but most of it will not even be seen because it is behind the stove! Gah.
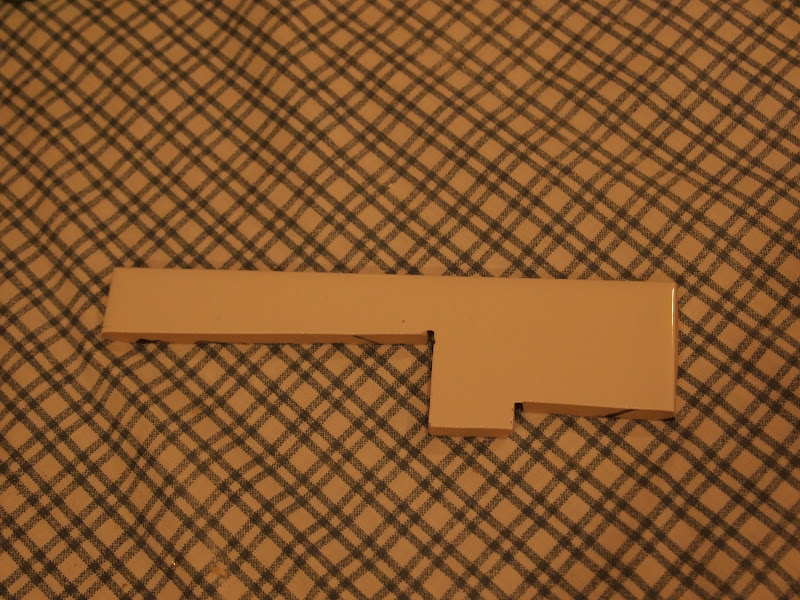
| My most convoluted cut yet. It took me two tries. (My math/ geometry was good, but I over cut the one corner because I couldn't see through my water-sprayed glasses.) |
Part way through the afternoon I thought I could get the tile done in two more sessions. Now I am not so sure.
But it's still progress, I'm not actually going backwards. Something to cling to.
| Need warpaint? Try spray-on tile dust! |
Subscribe to:
Posts (Atom)