Sunday, September 28, 2014

More Demolition Than We Thought and *Plans*

I thought I had a good plan. We moved out of the front bedrooms. We could pull them apart, put them back together, and then move back in. That would leave the back rooms empty so we could do those separately. Nice thought.

But it turns out we have to take out the wall between the bedroom we're sleeping in and the bedroom we're building.
It's the back wall in the picture above. That used to be closet space. The front wall (the studs) is a load-bearing wall so we can't take it out. But we want to put a door on the left wall (just outside the picture), and we have to move the back wall back 4-6 inches. No sense in dwelling on the short distance, though; it's the same amount of work for 4 inches as 4 feet, and at least we'll still be able to access the room we're sleeping in!

Since that picture, we have taken out all the lathe and plaster on that wall (both sides) and the last few sections of wall we needed to do. Here's a picture from the stair landing:
The construction zone is straight in front and to the right. We are sleeping to the left (past the hanging plastic).
 Here's a view from inside the master bedroom:
Troy is now working on ripping out the wall even as I type this.

Another thing he started was vacuuming out the stud bays on the outside walls and filling in the cracks with caulk.
Then we won't have to try to line them all with moisture barrier. I know there's not much in the picture for scale, but can you see how wide those boards are? That's what they were using for sheathing. Some day when someone tears down this house, I hope they recover that lumber and use it. Troy has identified oak and walnut among other types. Of course, now they'll have to clean off all this caulk, but I'm sure that will not be the biggest of their problems.

And another thing I've been up to is making plans. Like blueprint-type plans. I had done some layouts previously (see some here), but had had some revolutionary new ideas that I hadn't tried on paper. Troy and I measured everything again, and I made a scaled template of how the house is now:

(Although it is to scale, unfortunately the aspect ratio is not right. Things will look wider than they are. For example, the upper black rectangle is a square chimney but it looks like a rectangle. I also didn't include every single door and closet divder wall since at this point I already knew some of them would be coming out. Also, the bottom left window is in the wrong place. It's fixed on the plan below.)

I did a lot of playing around with stuff yesterday. Posted a plan to Facebook and then edited it at least twice more. This is what I have now:
The outside walls are thicker. The walls in grey are original walls we're not moving. All doors are 36". I was originally trying to fit in a powder room accessible from the hallway, but it just wouldn't work. Then I realized that it would only be used by guests staying overnight, so it really only needed to be accessed from the bedrooms. Adding a second bathroom definitely takes some space out of the right bedroom, but it was going to be narrow no matter what, and the long skinny shape isn't that great anyway. I'm pretty happy about getting it in.

And the walk through closet and master bath? I'm really happy about that. I couldn't figure out how to get both rooms into what was a bedroom, especially with that window in the middle of the wall. I couldn't put in a wall splitting the room in half. I don't remember exactly what we were talking about but during or because of a conversation with my sister Kim, I realized what I had to do--build the wall only part way across the room and leave the window area open. My original plan had access to the closet and bathroom only from the bedroom. So you would have to go the long way around to get dressed after your shower or vise versa. Having a walk through was perfect and solved the window problem.

Look it over. Let me know if you have any suggestions. I'd love to hear them, sooner rather than later. Thanks!

Saturday, August 30, 2014

Ripping Up Carpet

Troy got the carpet out of the spare bedroom on Wednesday and I took out the underpad today. I also went around removing the carpet tack strips, nails and staples, and swept up.
Of course, they'll be more to clean up, but for now it's a lot better and a lot further along. I feel like I gain a bit of sanity when I get an area cleaned up again.
Here's the doorway area where there used to be three doors:
Troy took care of that on Wednesday too.

Once I was done with that room, I tackled the carpet in the master bedroom. Cut it up, rolled it up, tied it up and carried it out. Then I took out the underpad in that room. (It had lost all structural integrity as they might say on Star Trek and had to be shoveled off of the floor and carried out in bags.)
Yes, look at what I found under the carpet! A lovely blue paint on the floor. If I knew that was there, I would have ripped out the carpet long ago. The blue is not a colour I would pick, but I love it. Certainly it would have nice enough for me to enjoy for the last 8 years instead of that awful carpet.
When Troy got home, I excitedly showed him the floor, but he couldn't see anything but an ugly floor. He likes the "wood-coloured" one in the spare room. It seems I will never be able to convince him that painted wood floors look good. (I wouldn't put them everywhere, but I do really like them.)

From the condition of the underpad and carpet, Troy figures they went in in the 70s. That means the painted floor is likely from the 60s or earlier. It was a lovely surprise when I pulled up the first bit of the underpad. I think it's the first bit of "pretty" we've uncovered while taking apart this house.

Saturday, August 23, 2014

Moving On Up

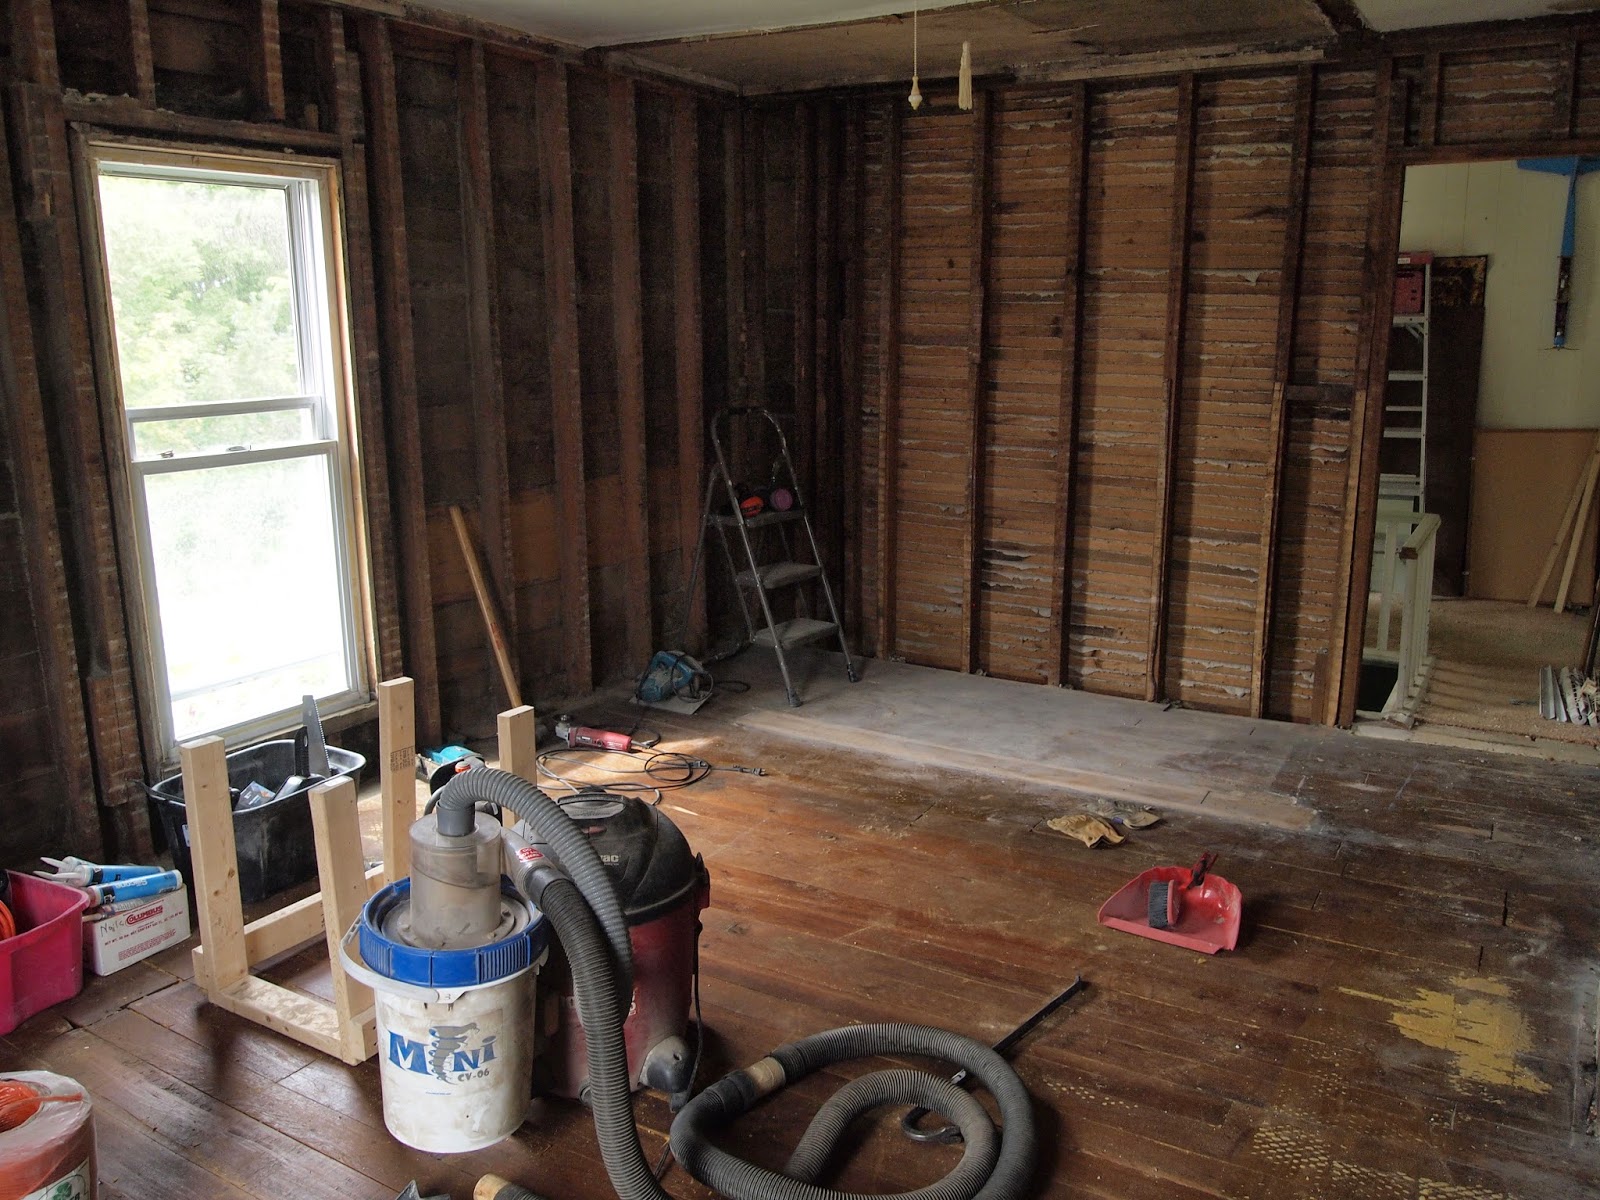
Yup, we're working on the second floor now. We have moved our bedroom into one of the back rooms, stuffed the bathroom with extra stuff (including the two spare beds), and emptied out the two front bedrooms.

Then came the sledgehammers. Well, not quite, but you get the idea. We tackled the master bedroom first.

Part of that involved taking out the one window. To fix the problem from the outside, we mounted this quilt square that I made last year:
Yup, I have a maple leaf block on my house. I love it.

You know we always find head-scratchers when we take stuff apart around here, so look at the window:
 Notice anything?
Ok, it may be a little hard to notice since the picture was taken after Troy fixed it and squirted insulation everywhere, but there was no header on the window opening. There are some pieces of wood that go across the top, but it's not a header. They just span the space between each stud. Crazy.

And the closets:
Why build a frame when you want to add a doorway? Just cut the stud and put some trim around the opening. Craziness. (In the master bedroom that was done in a load-bearing wall.)

We also found some wasp nests:
That's a paper wasp nest on the left, and I guess a "regular" wasp nest on the right. Troy took one out for a closer inspection:
Just what you want to find in your walls, right? These appeared to be old. I think we sealed up the entrances when we did work on the outside a few years ago.

Once that bedroom was done, we moved onto the west bedroom which will turn into our closet and bath. I finished all but one last small section of wall today:
 It was very exciting to me to open up the wall between the two rooms.
And today I enjoyed opening up what was the closet space. Fortunately, we're going to be able to take out that wall because it is not load bearing. Although the layout is not finalized, I'm pretty sure that will be my bathtub/shower one day. (That is what is motivating me through this--my mantra of "master bath. master bath.")

All this work upstairs has made a mess downstairs. Unlike modern houses where the different floors are separated from each other, this house is "balloon framed" so there is one continuous space between the studs from bottom to top. So we have a lot of plaster falling down through those holes. These holes in the closet run along the stairs and go right through to the basement I believe:
At some point we are going to have to remove these doors, frames, etc.:
Hmm...adding one more door would make
this the Tardis (inside out).
That space will become part of the room. I think it looks funny from inside the rooms now that they are all one space:
Closet and spare bedroom doors.
Spare bedroom and master bedroom doors.
Maybe it looks more like the Tardis from this side. (Anyone got some blue paint?)

I also was amused to see this extension cord still carefully threading its way through the doorways.
We have a lot of lathe and plaster piled up behind the house. Troy found a dump that will let him unload it by the pickup truck load. Much better than putting it in trash cans!!

Saturday, January 04, 2014

Not to Leave out the Dining Room

After all the work on the living room, we moved on to the dining room. (I could tell it was getting a little jealous and feeling shabby in comparison.)

The dining room had been drywalled and insulated quite a while ago. I believe Isaac did the first coat of mud, but that's as far as it got. Troy and I finished the sanding and did more mudding (repeat ad nauseam).
South wall.
West wall.
Finally this week it was done! I primed,
South wall.
West wall.


and then painted:
South wall.
West wall.
Long south wall between living room and dining room.
There's an awkward spot where the old paint of the living room meets the fresh paint of the dining room. I'm pretty sure I'm going to leave it at one coat right now (it looks pretty good) and save the second coat for when I can do all the walls at once (including the interior walls which aren't finished yet).

While we've been working on these two rooms, I have been moving the insulated blinds to whichever room had the least dust and dirt. (The two rooms have three windows each which mirror each other.) Now that they're both going to be living spaces again, I could finally pull the second set of curtains out of storage.

I thought I remembered that one of them wasn't even finished yet (and that turned out to be correct), but I got a worse surprise when I pulled out the two that were finished.
I didn't think I'd be able to capture it in a picture, but they are a nasty bright shade of rusty orange! I had these blinds wrapped up in a sheet to protect from light damage (and it's not like they were stored in the sun), but obviously something happened to the colour. Yucko.

One of the blinds that was not in storage.
The lighter areas are faded from UV
exposure.
The colour of these blinds has been a problem from the start. When I bought the fabric, I thought it was primarily navy blue with a gold tone from certain angles (like flip-flop paint). Once they were hung, however, they never looked blue again. They're kind of a drab brown, and all the time we've had them up, they have looked horrible with the brown paneling that was on the wall. (I actually wonder if I picked up the wrong roll of fabric off the rack after wandering around looking at everything they had.)

I had intended to pick out a paint colour that would complement them better, but forgot all about it when actually picking out the paint. It's all for the best though; these curtains really need to be updated.

I found this picture on the Joann website. I think
this is the colour I was looking at. Just keep
in mind that it is a large scale print. I'd guess
the birds are about 6" tall.
Yay? Nay? Let me know.
I took a look at Joann's earlier this week and the only thing I found was a really bright big bold bird pattern. It might be a bit too much, especially as there's so much of the blinds--six big windows. But I might do it anyway. I can try it on the one blind I have to finish anyway and see if we like it before I do all of them.

Redoing these blinds is going to be a shitload of work. I am not looking forward to it. But on the other hand, it will be expensive too...

Blog Archive